Dynamic Facebook Ads based off product catalogues are one of the most profitable ad types. And until now, it’s been very difficult – if not impossible – to do this with the Neto platform. After hours of research, digging and experimentation (plus numerous calls to Facebook and Neto) I have the solution!
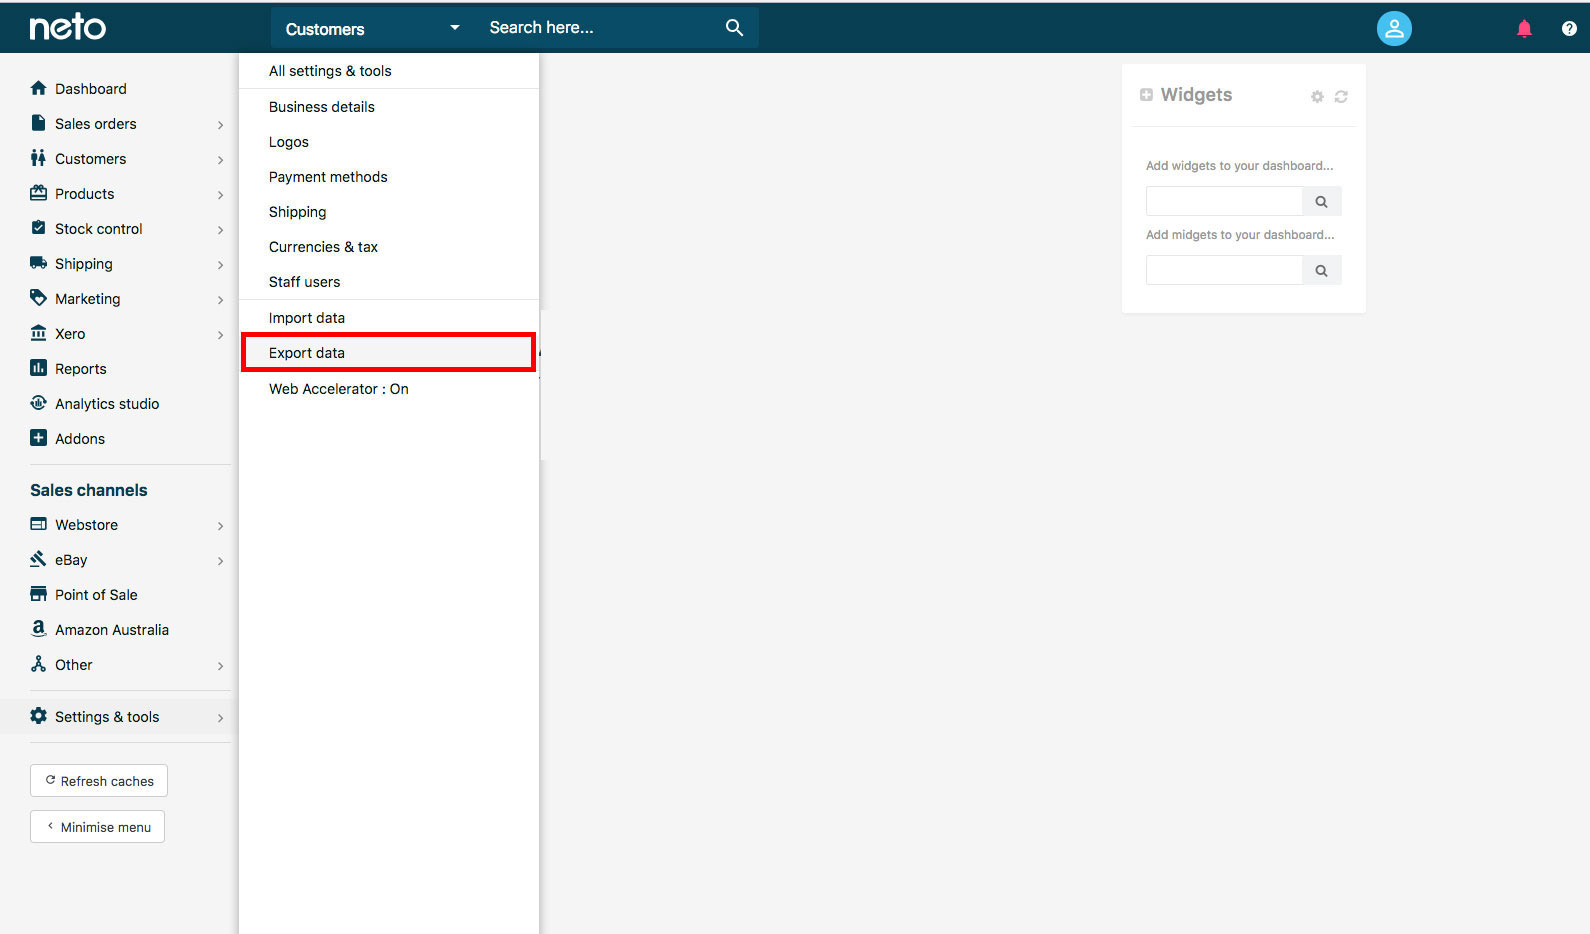
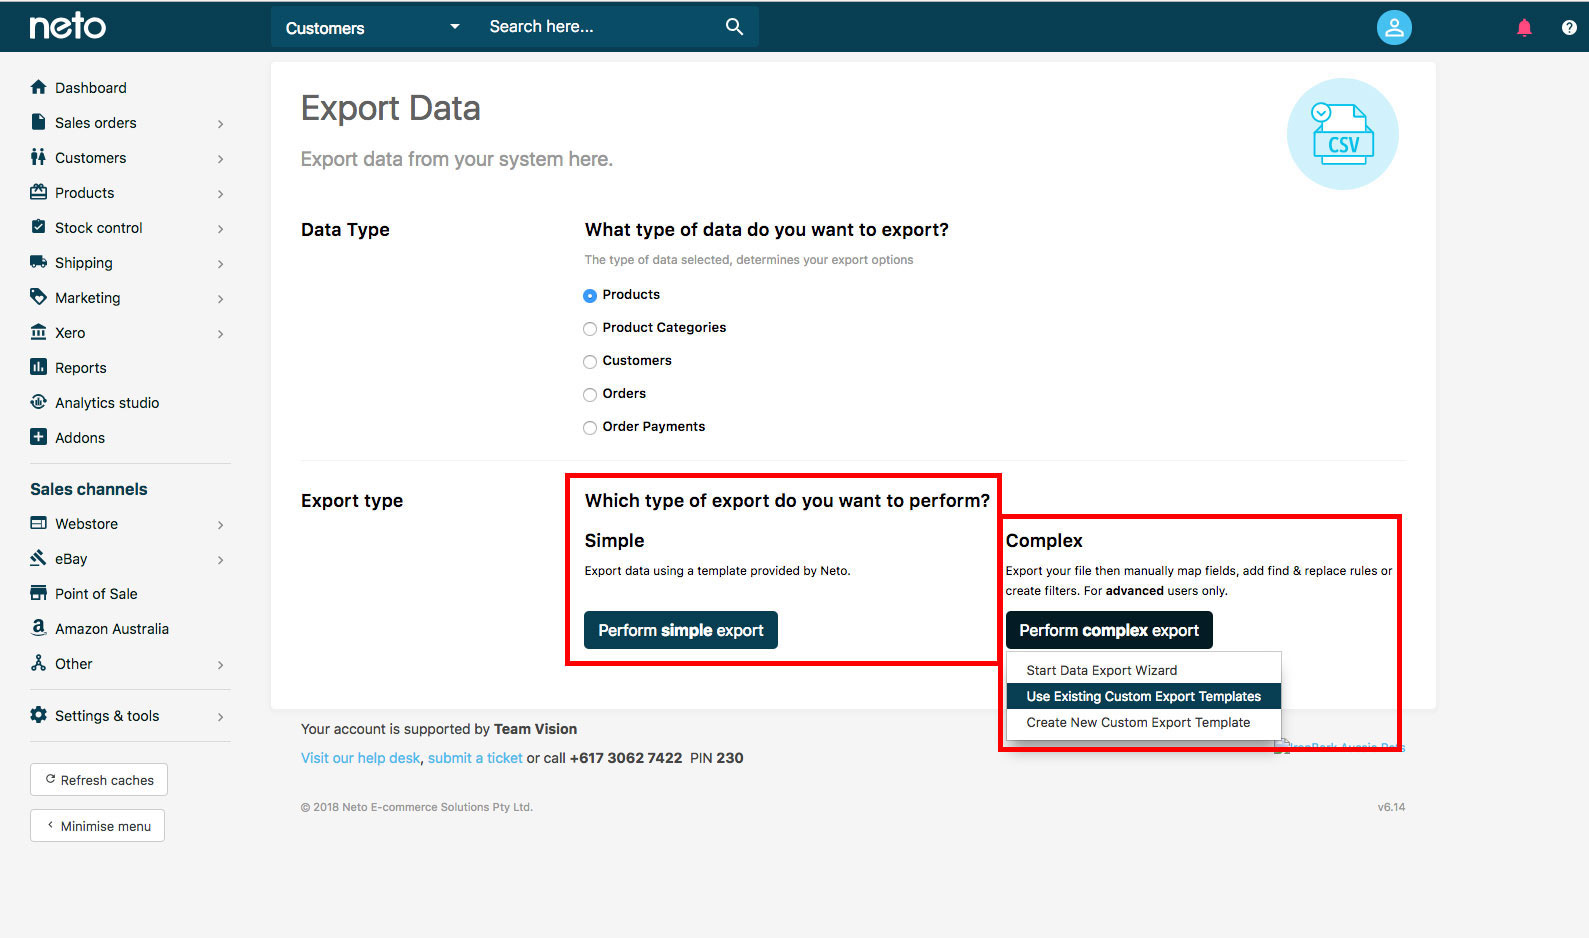
Firstly, go to your Neto Dashboard, select “Settings” and “Tools” and then “Export Data”.
You’ll then be taken to this screen. Make sure to select “Products”.
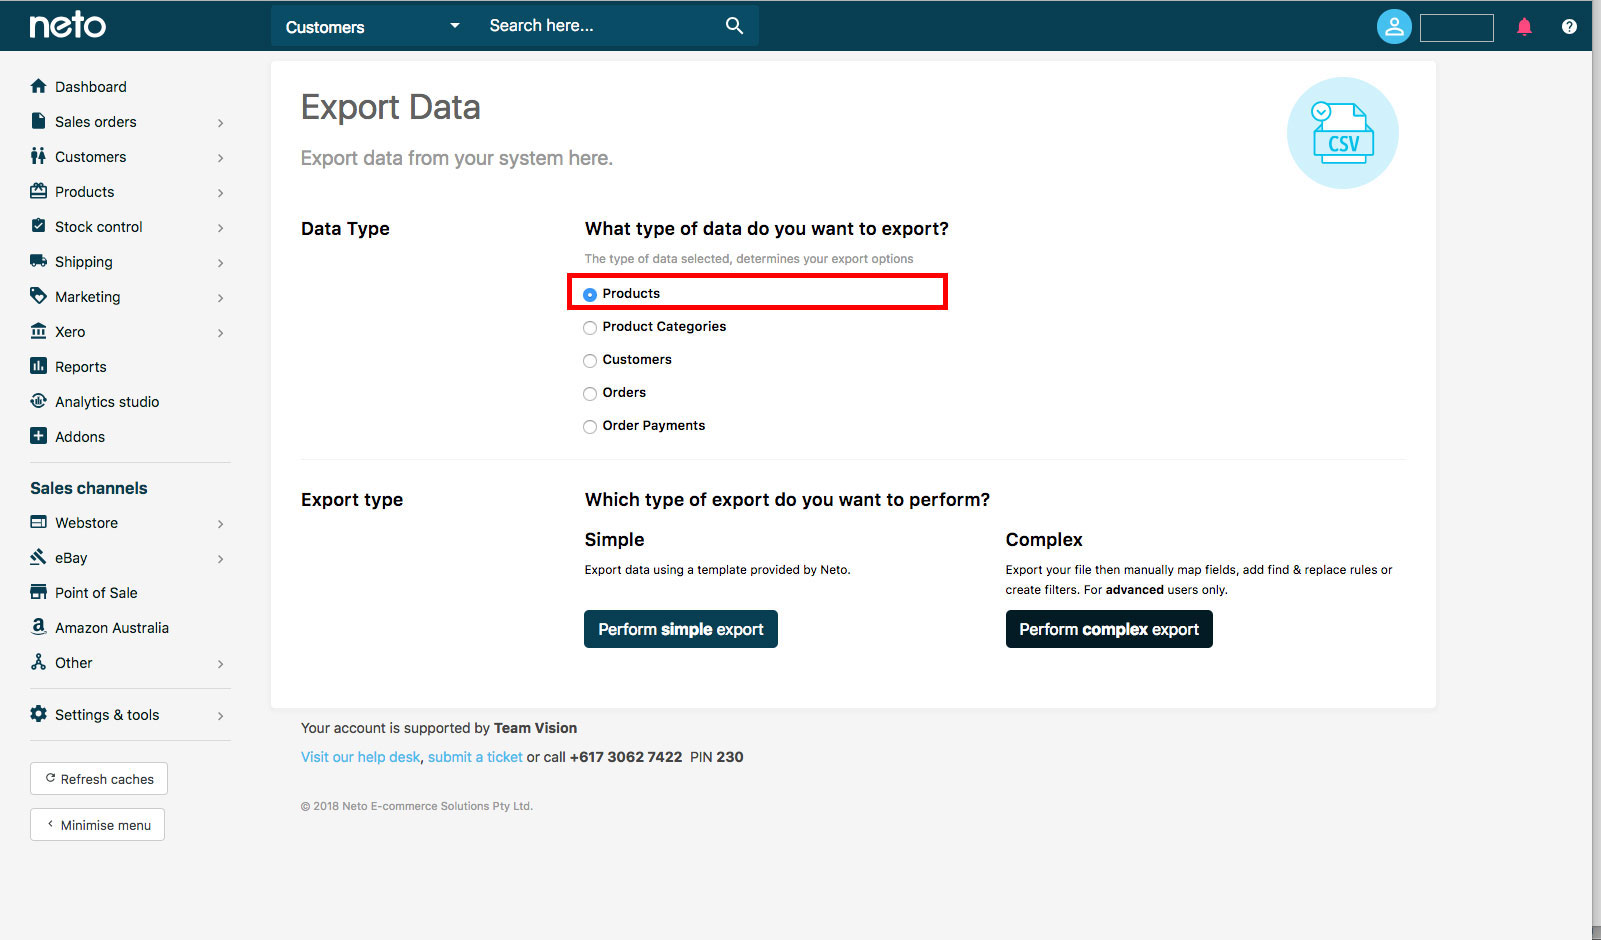
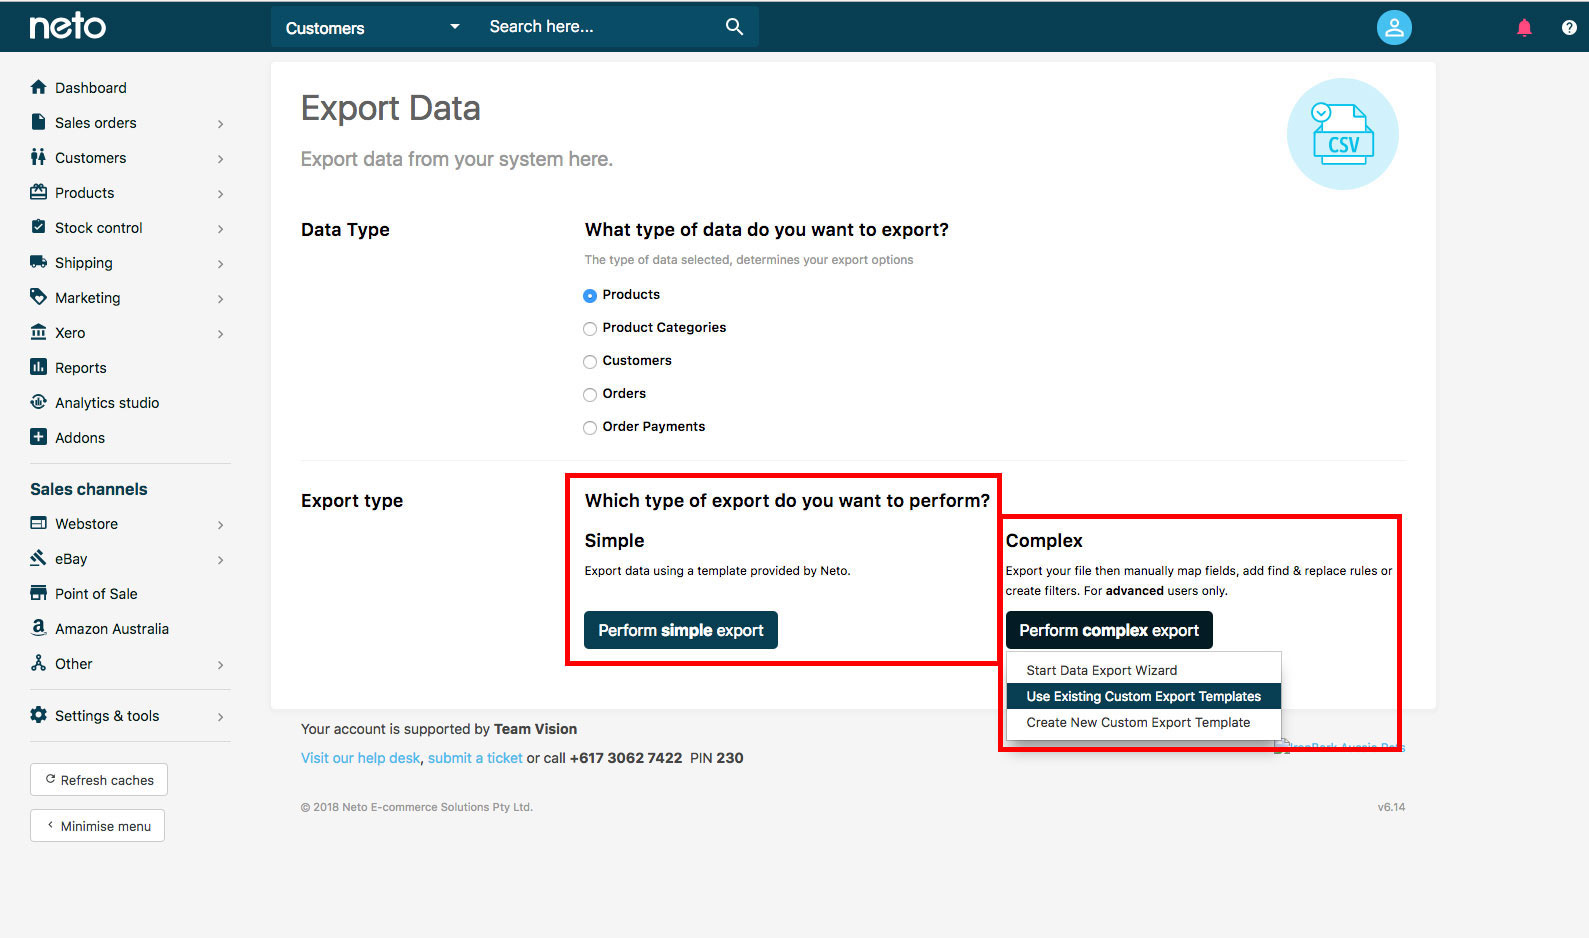
Now, we want to do a Complex Export using an Existing Custom Export Template – NOT a simple export!
This will take you to this screen, with all of the Neto custom templates. We want to find the “Google Shopping Feed”, then hit the little pen on the right-hand side, and select “Clone Template”.
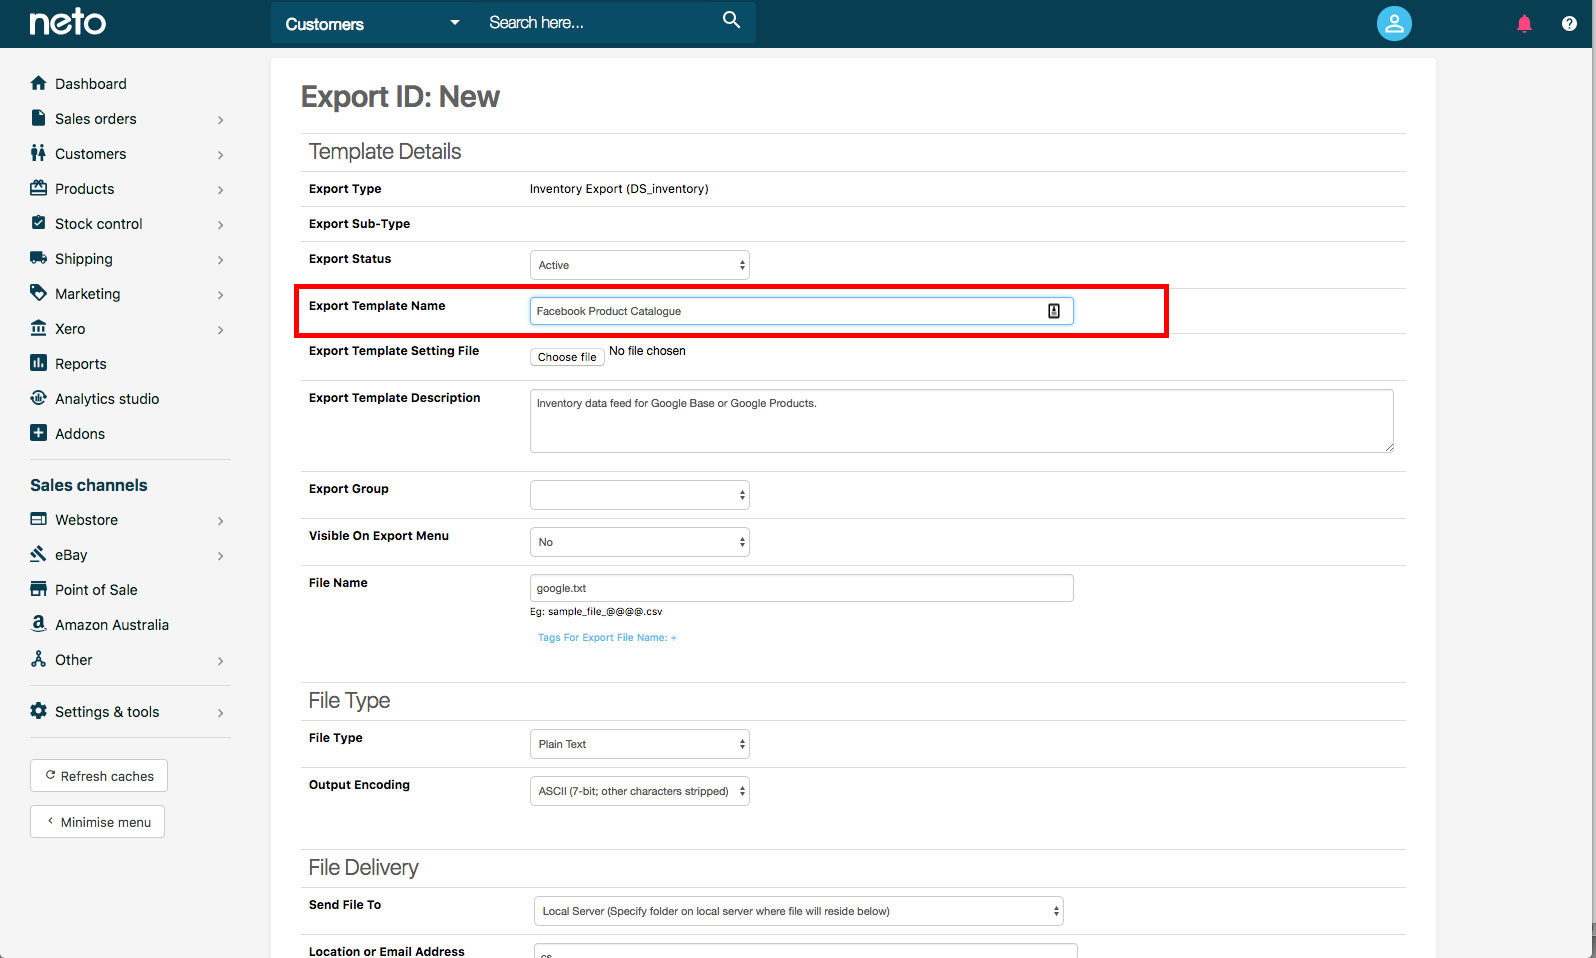
We now need to create your “Facebook Product Template”. First, give it a unique name: I like to use ‘Facebook Product Catalogue’ and the date.
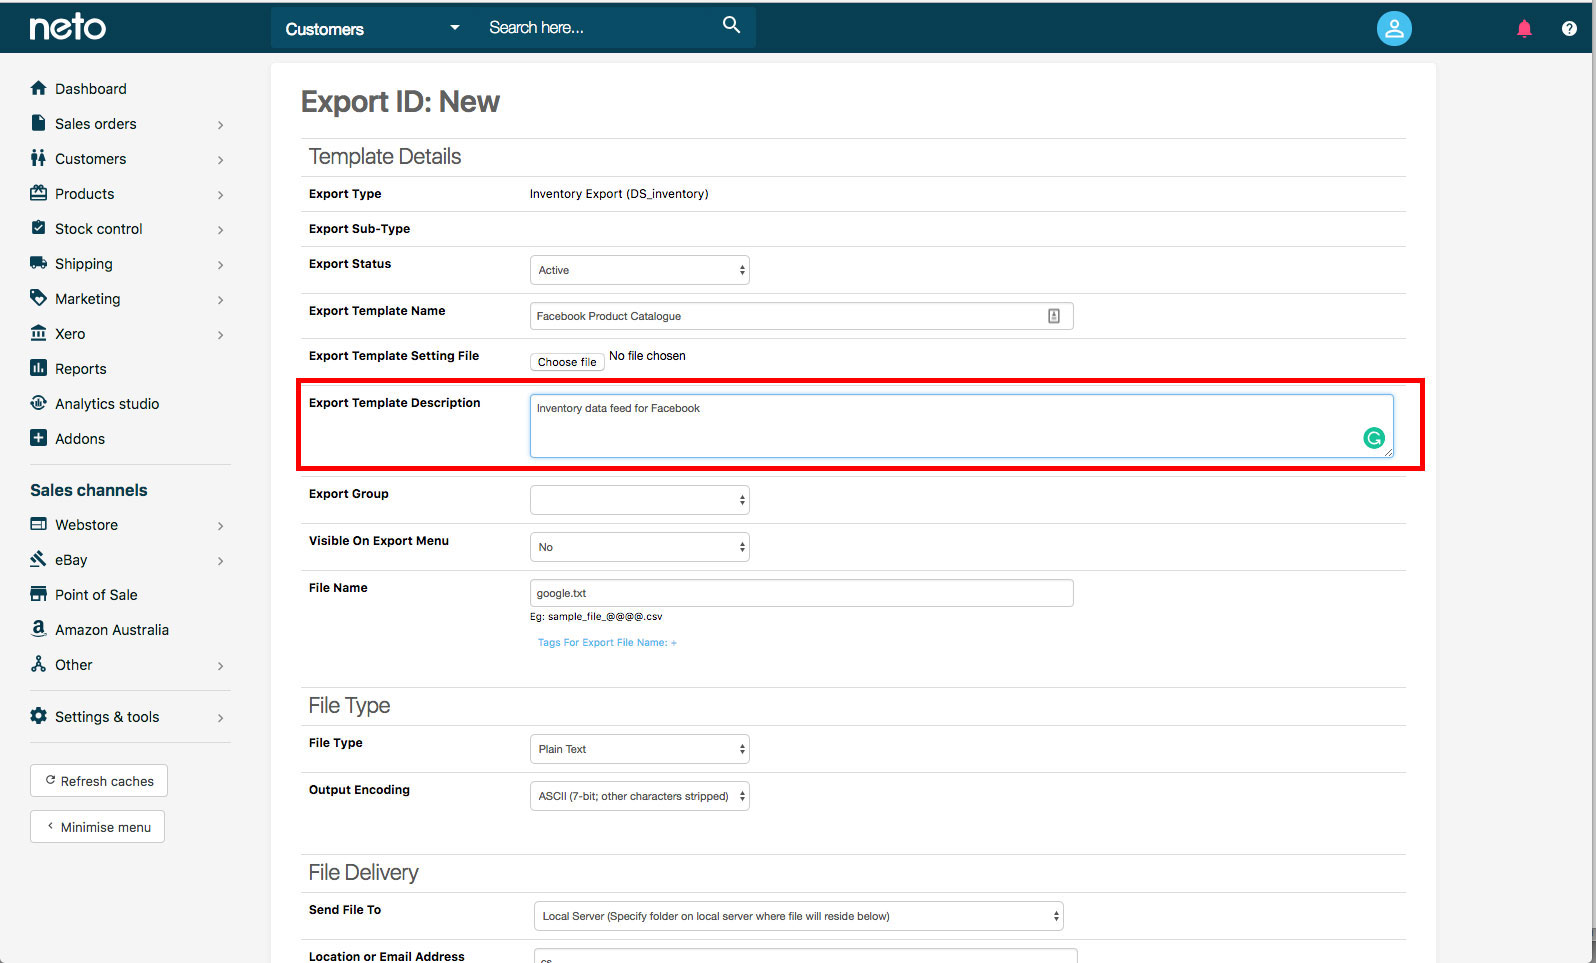
Give it a little description – what you write here isn’t as important.
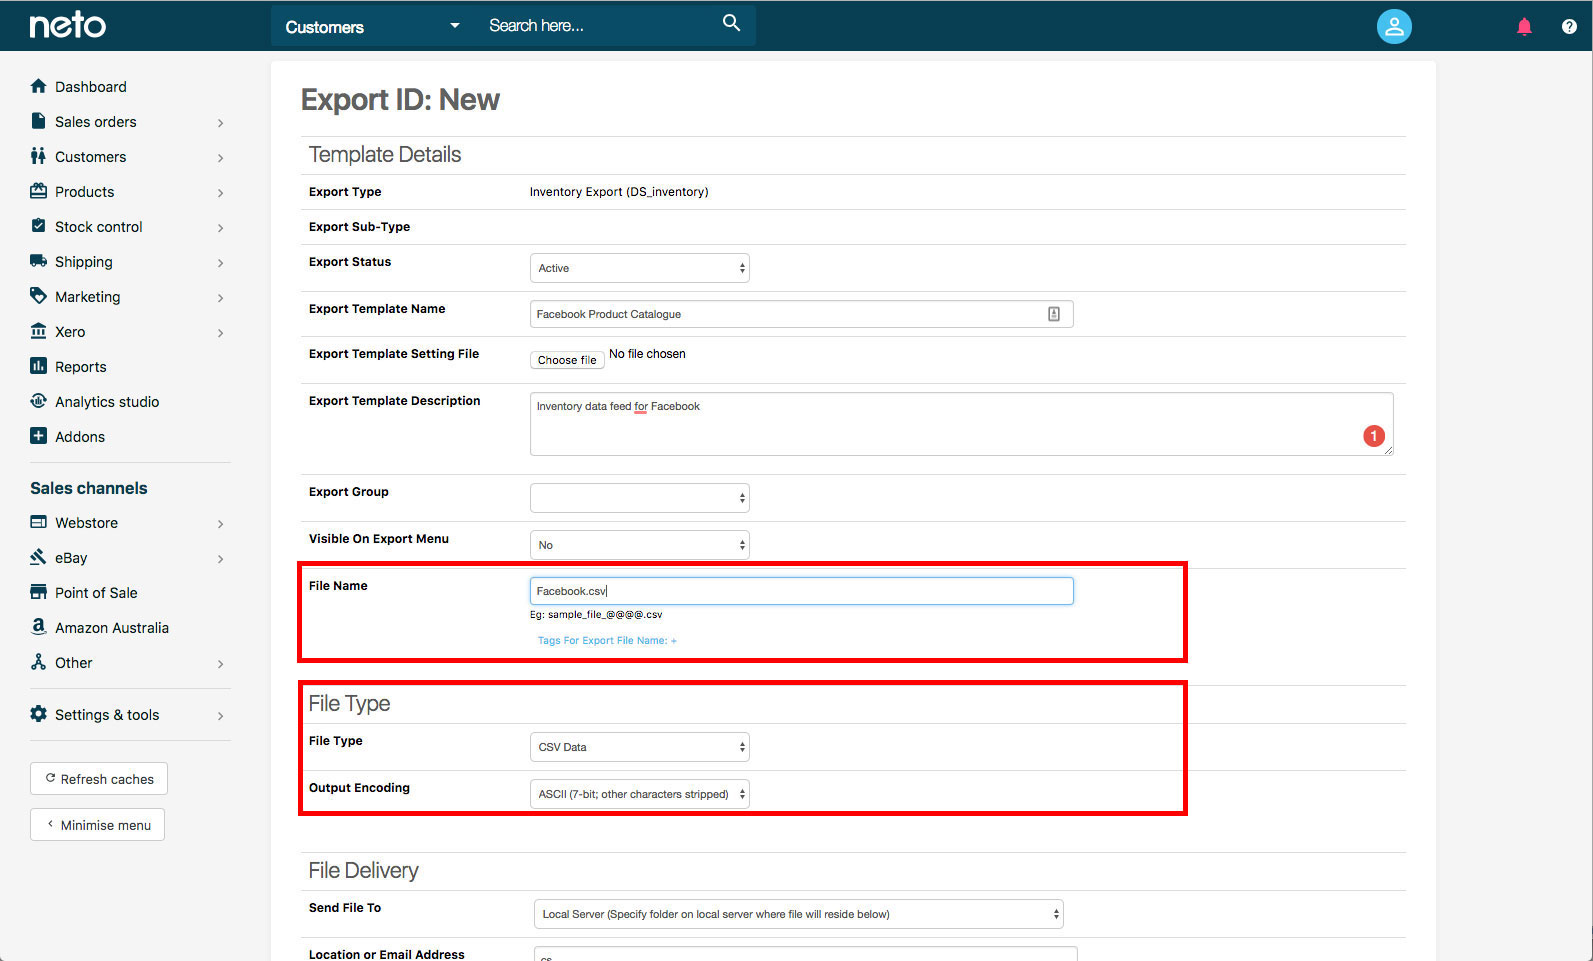
Now we need to name the file. Keep it short and sweet – and make sure the file format is a .csv. Facebook needs it in this format to load your catalogue properly.
You want to make sure “Local Server” is selected, and that the “File Location” has been updated with your new file name. You may have to go back and hit “Enter” in the File Name Section – or re-change the file type to .csv for it to update.
It’s fiddly – but it works.
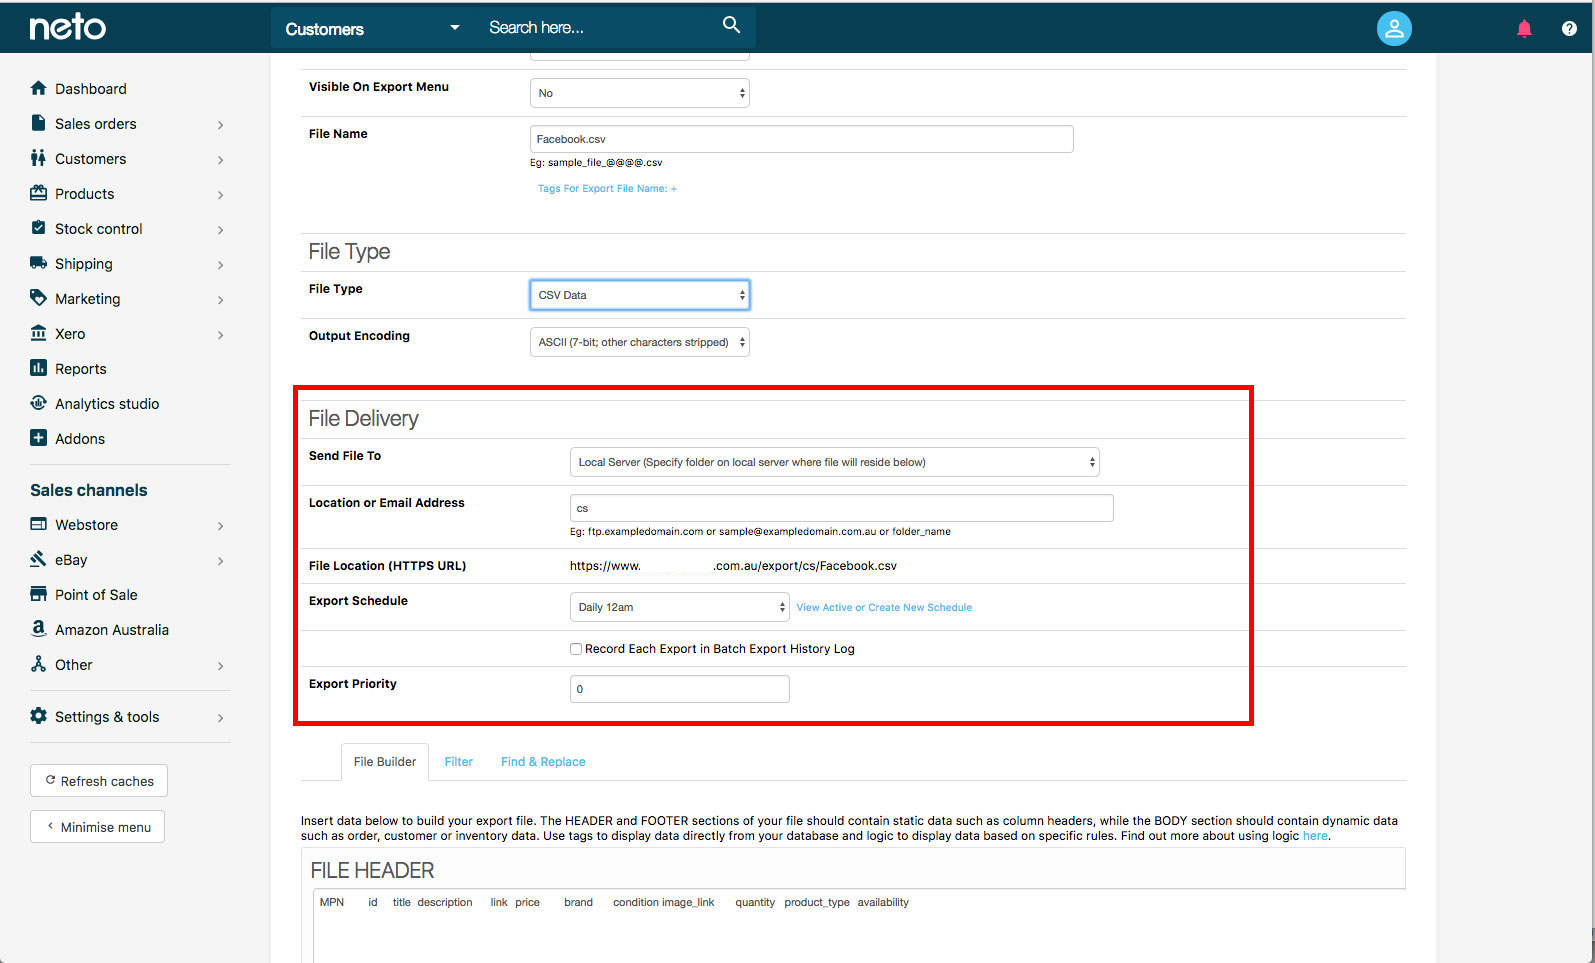
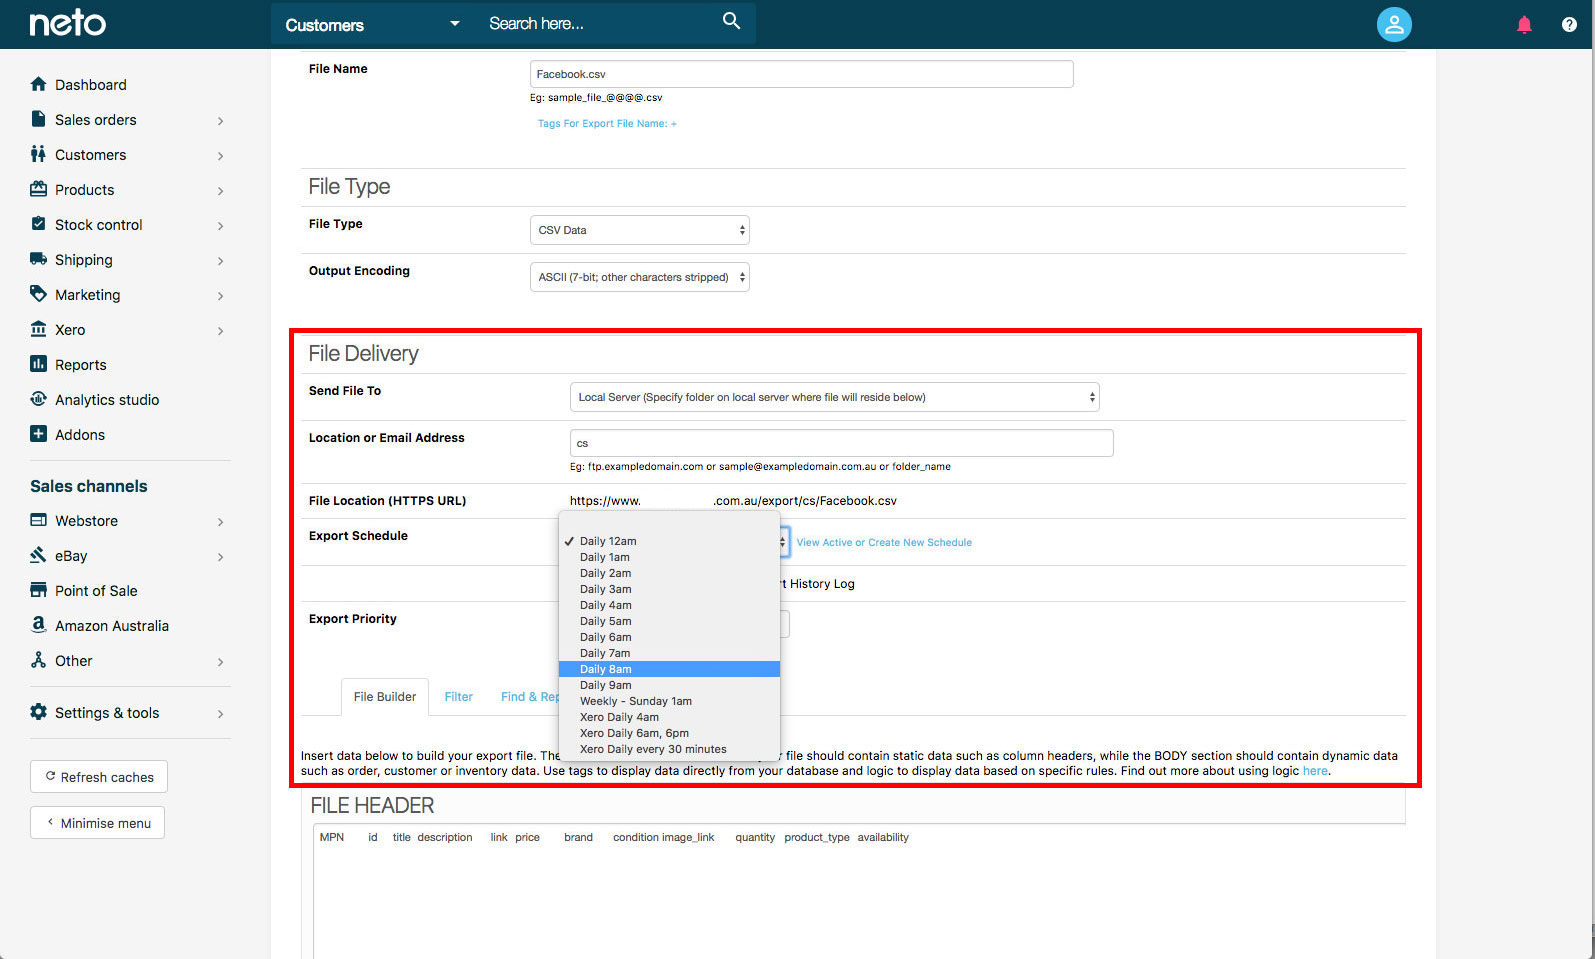
You’ll also need to change the “Export Schedule”. This is important because it’s the time of day your feed will upload. If you’re a smaller store, you can easily get away with a once-a-day upload. If you’re larger, frequently run out of stock or have products being uploaded constantly, you’ll want to pick a more frequent schedule.
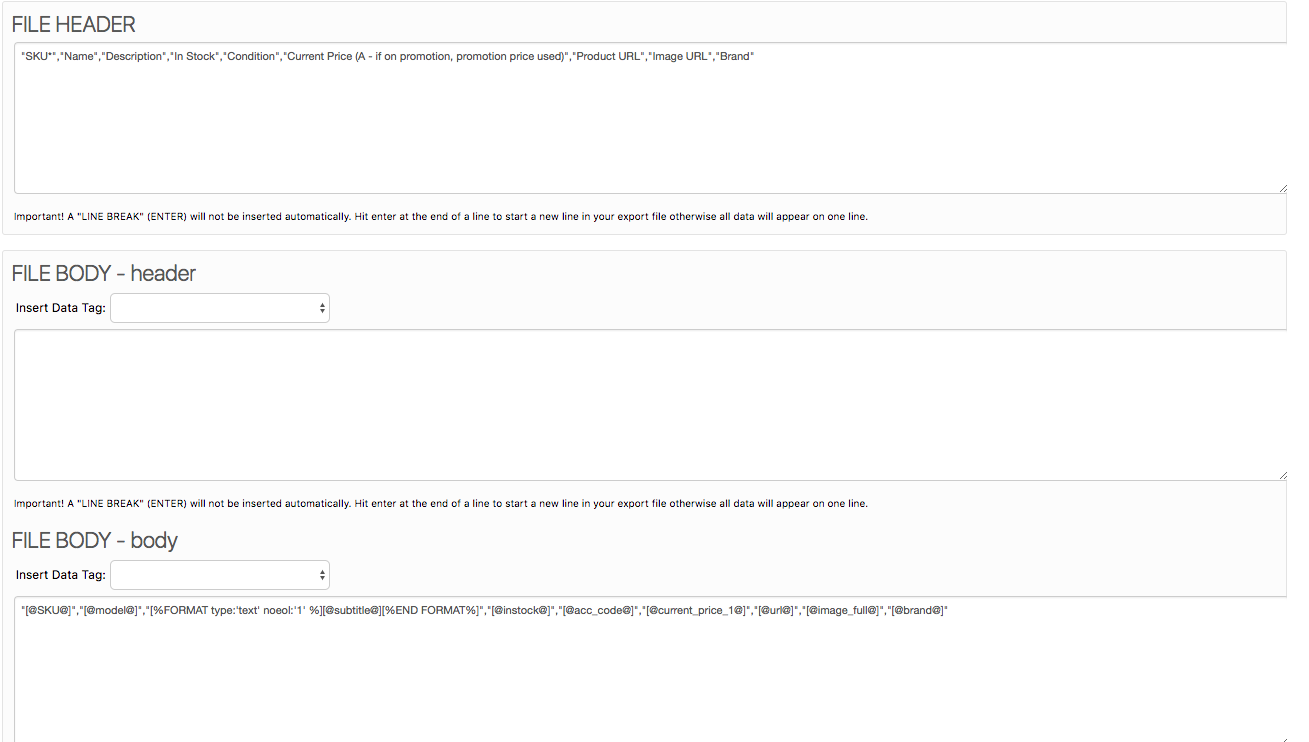
Now, this is where it gets tricky. The “File Header” is the column names that Facebook will be looking for, while the “File Body” is the content that fills those spaces.
You’ll need to edit the “File Header Names” to match with the Facebook required “Column Names”. This is a simple matter of writing over the top of them: “SKU” becomes “ID”, “Name” becomes “Title” etc.
Facebook Required Data
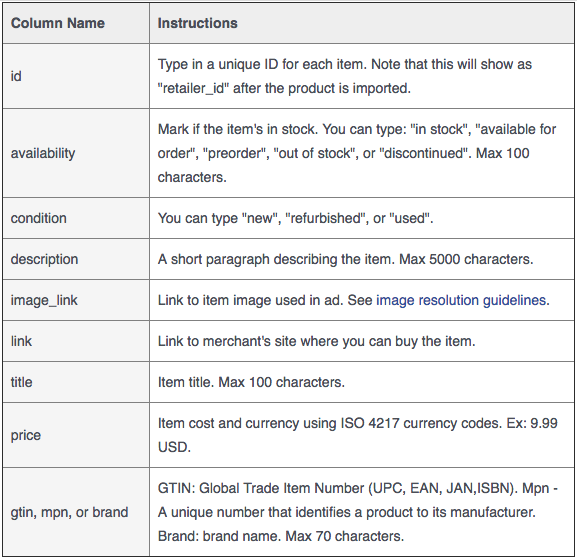
These are the column names Facebook requires.
Subscribe to
Bright Red Marketing!
Want digital marketing tips, strategies and updates delivered straight to your inbox?
Subscribe to Bright Red Marketing.
For the “File Body”, this is the information that will populate those columns.
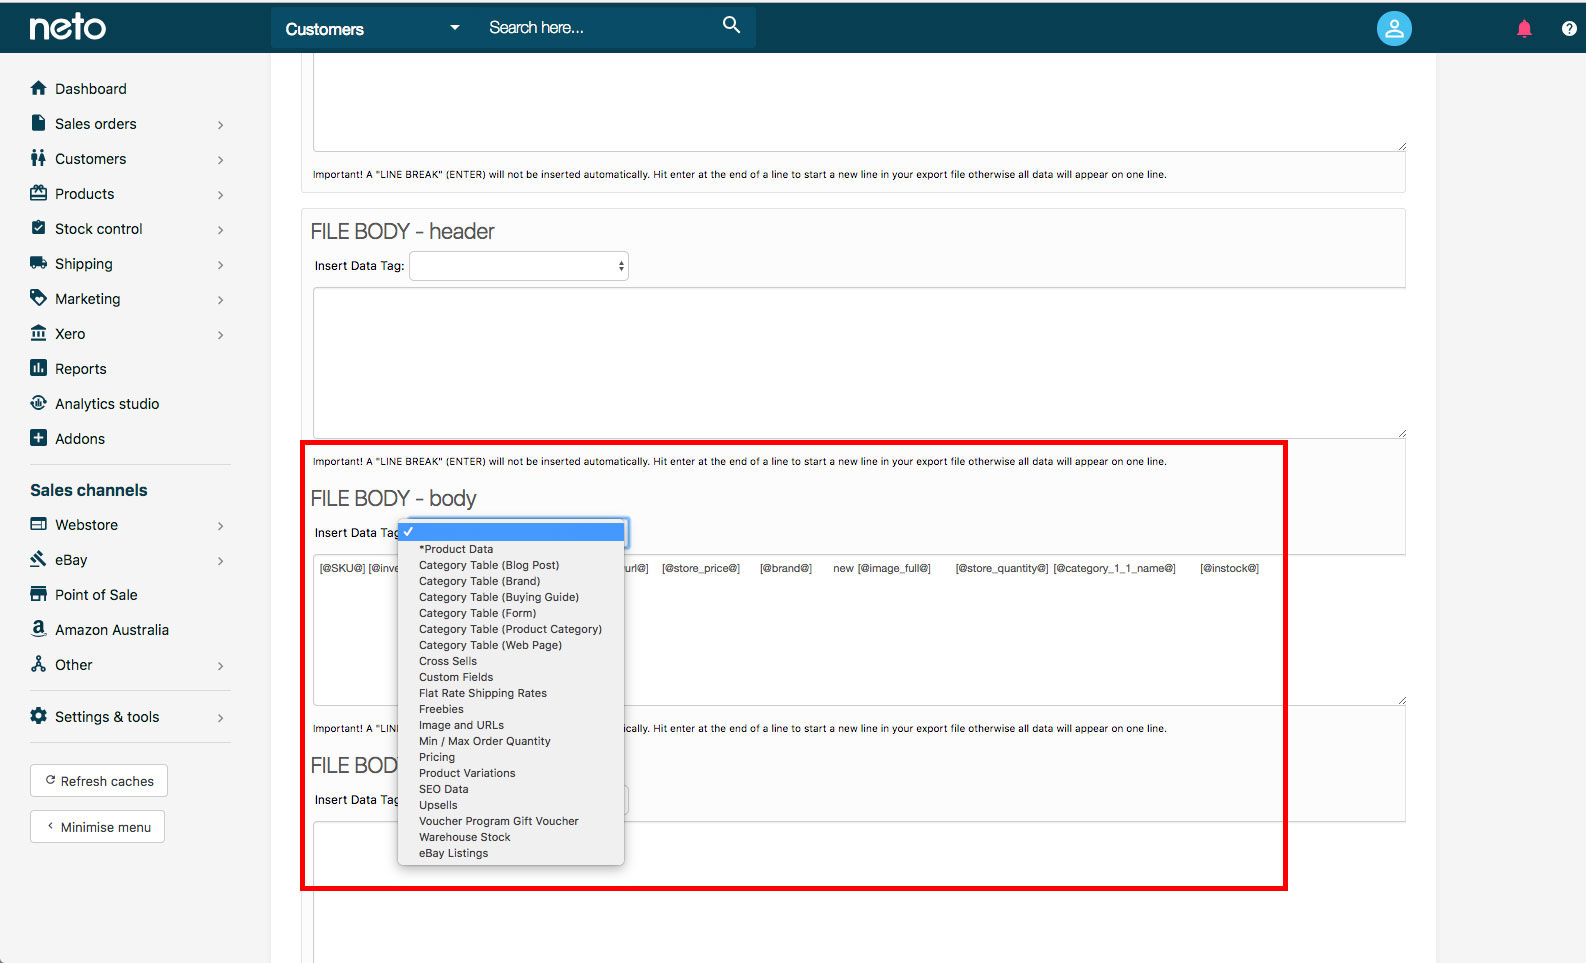
This gets a little more difficult with the Neto back end system. It will depend how you’ve set up your store as to how you do this. But between each set of parentheses ([@ @]) is the field it will use. “SKU” is fine to use, but you may have multiple pricing options, image URLs, etc. So this will be customised to your particular store.
It can be a bit of hunt to find the coordinating data entry field, but they are all there. The only one I’ve had issues with is “Condition” – which we can set up as a custom rule – which you’ll see below.
Once you’ve finished, you’ll want to hit “Save Changes” and then grab that URL from the “File Delivery Section”.
You’ll then use that URL to set up your Product Catalogue Feed! Facebook has great resources on setting up the feed, which you can find >here<.

